Prerequisites
Before using Sequences, you need:- Admin or User role with appropriate permissions in your Reevo workspace
- Connected mailbox to send emails from sequences
- Contacts or accounts to enroll in your sequences
- Email templates (optional but recommended for faster setup)
Get Started
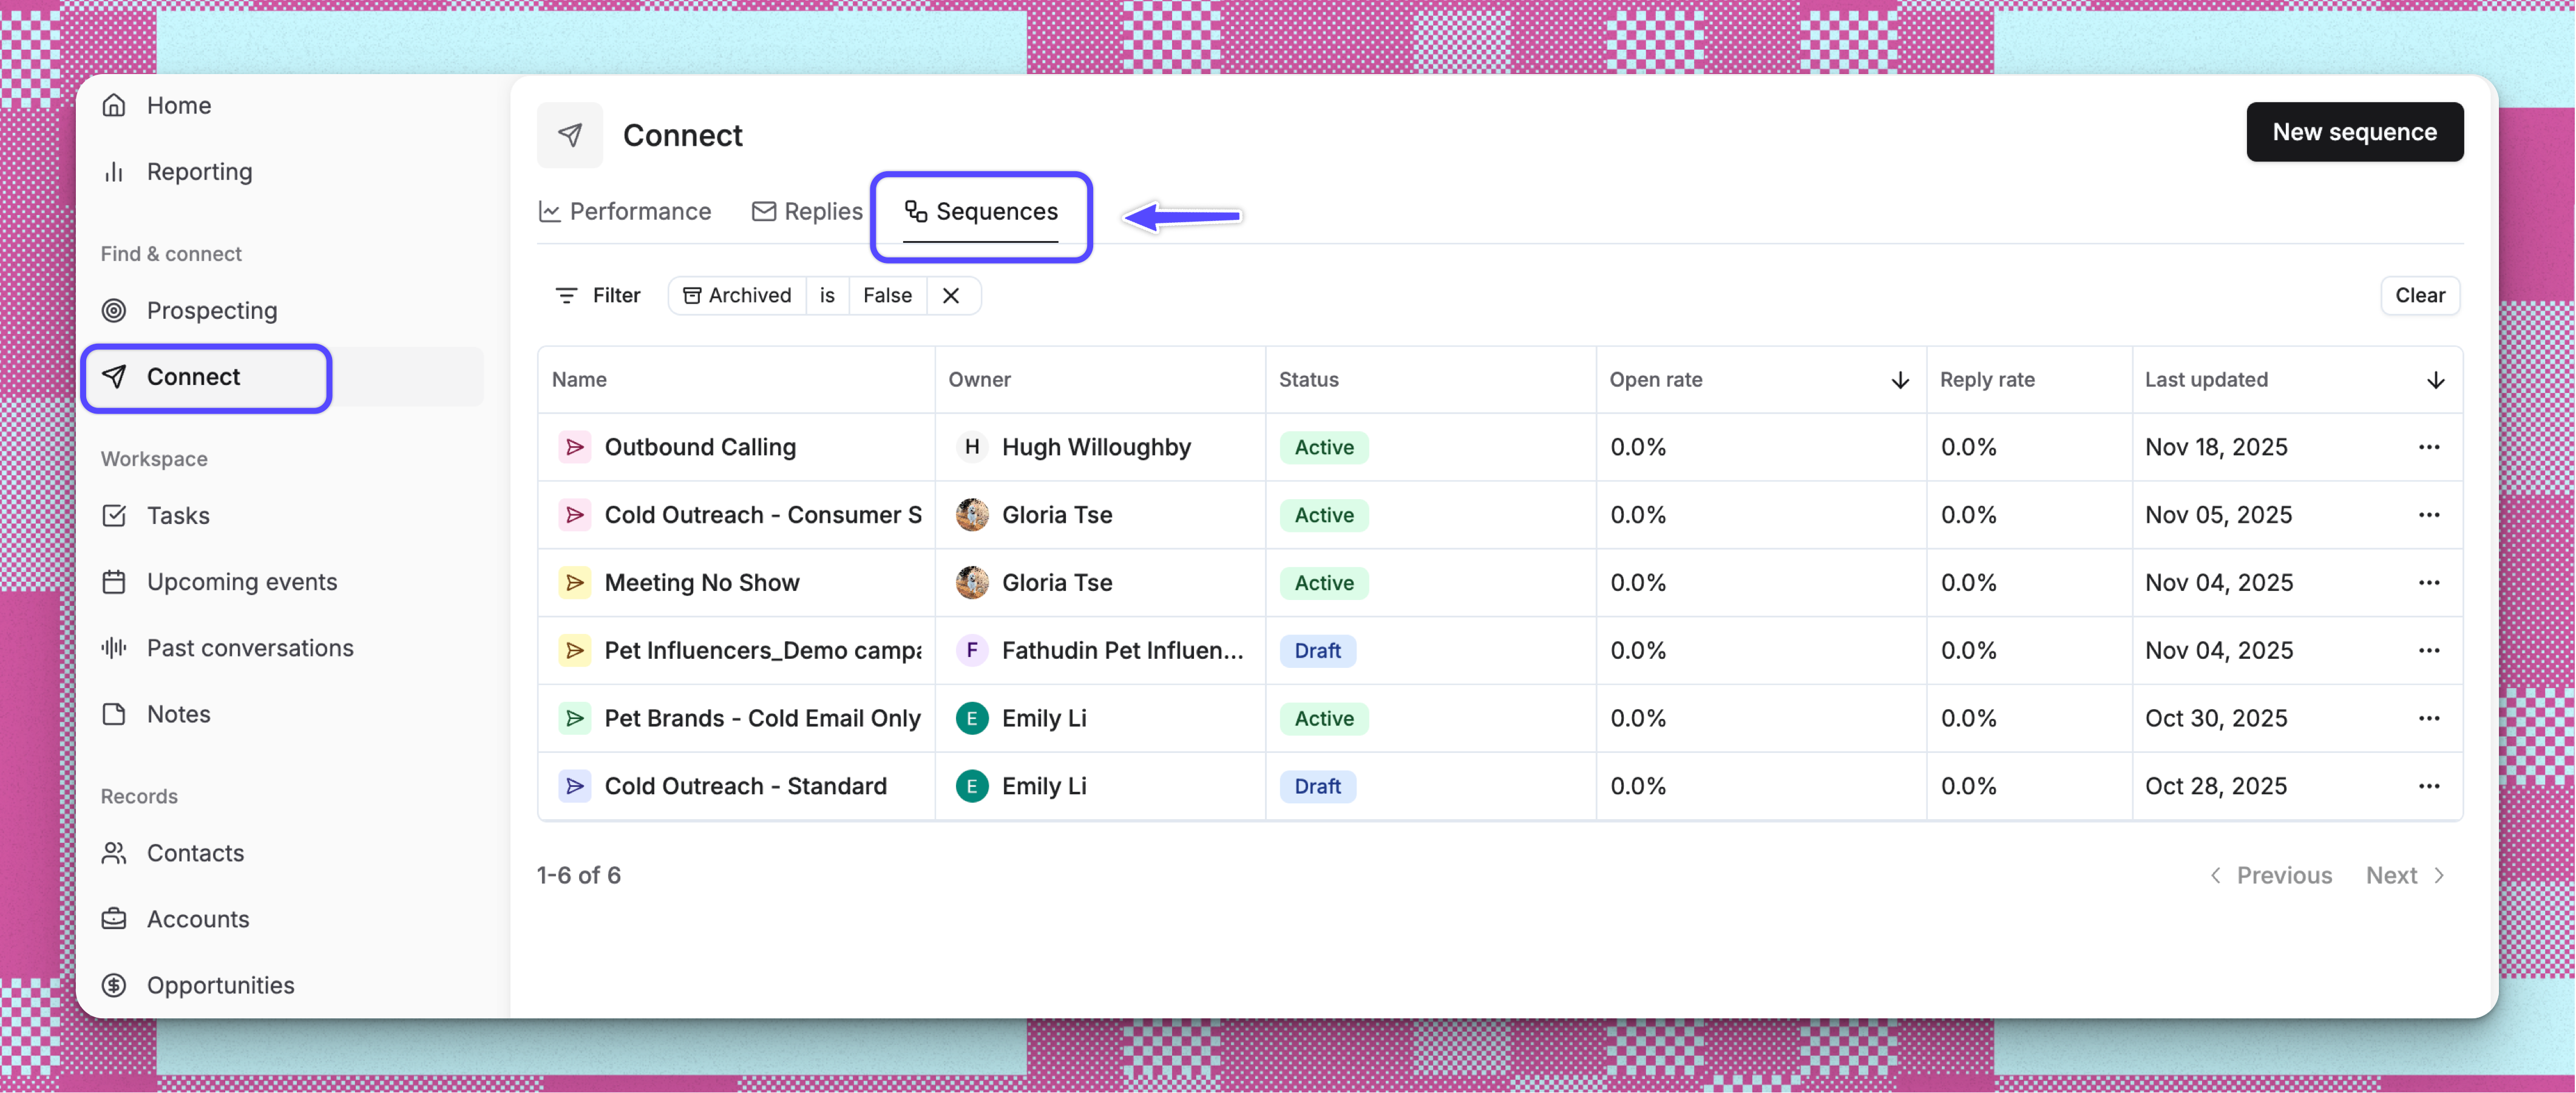
Accessing Sequences
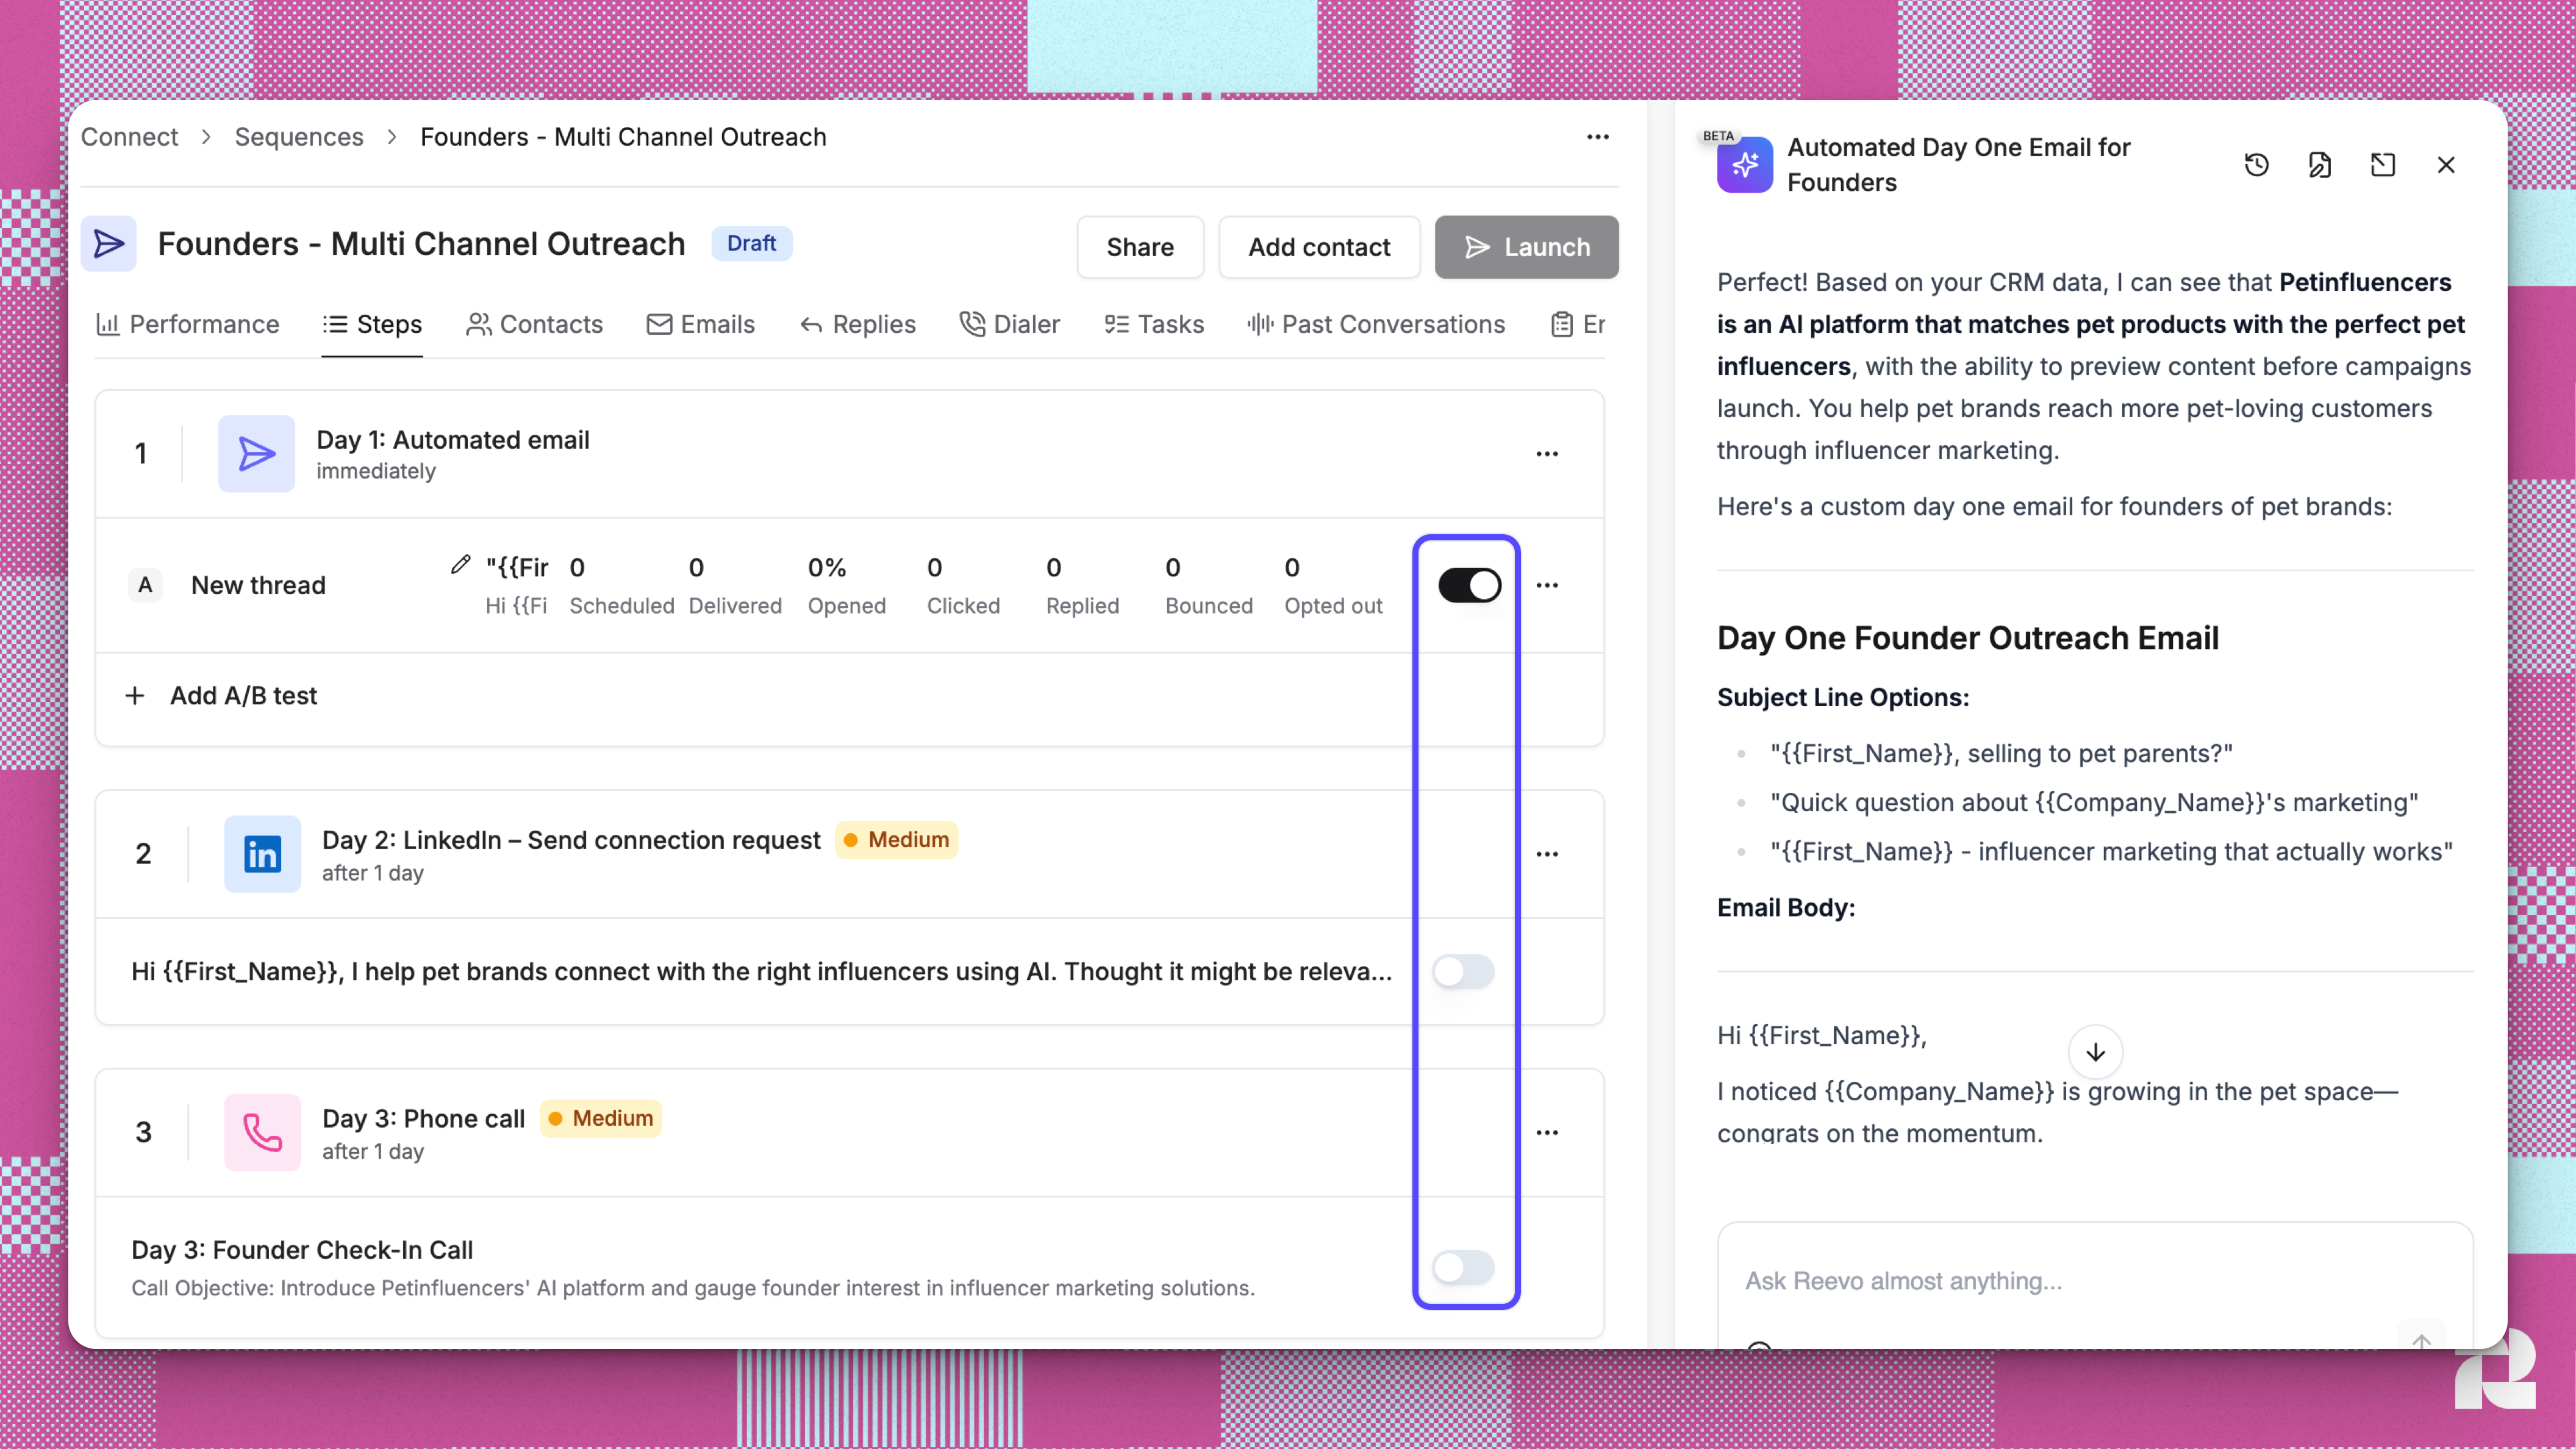
Understanding Steps in Sequences
A sequence consists of multiple steps that can include automated emails, manual tasks like calls or LinkedIn outreach, and A/B testing variants to optimize messaging. Reevo offers full customization of these actions to build sequences that fit the way your team sells.| Category | Step Type | What it does | When to use | User Experience | Action Required |
|---|---|---|---|---|---|
| Automatic | Automated Email | Sends emails automatically without user intervention. | For standardized messaging that doesn’t need customization. | Emails queue and send automatically based on schedule and mailbox quota | None (System handles everything). |
| Task | Manual Email | Creates a task to review and send an email manually. | When you need to personalize messages or add context. | A task appears with a draft email prepared. | Open task, review/edit, and click send. |
| Task | Phone Call (Contacts enrolled in this sequence must have a valid phone number in your CRM) | Creates a call task with instructions and talking points. | For phone outreach in multi-channel sequences. | Task appears with call details and priority level. | Complete call and log the outcome. |
| Connection Request | Creates a task to send a LinkedIn connection request. | To expand your network and get on prospects’ radar. | Task includes the connection message and note. | Send the request via LinkedIn. | |
| Message | Creates a task to send a direct LinkedIn message. | For following up with connected prospects. | Task includes the message content. | Send the message via LinkedIn. | |
| InMail | Creates a task to send a LinkedIn InMail (Premium). | To reach prospects you aren’t connected with yet. | Task includes InMail content. | Send the InMail via LinkedIn. |
How to Create and Launch Sequences
🧬 Step 1: Creating a Sequence
- Ensure you have at least one mailbox in your email setup (under settings) that is enabled for sequences and ready for sending
- From Connect > Sequences, click New Sequence to start a new sequence
- Select one of the following creation methods:
- Start from scratch: Build a completely custom sequence from the ground up
- Best for unique outreach strategies or when you need full control over every detail
- You’ll configure the sequence name, schedule, and steps manually
- Use a sequence blueprint: Choose from pre-built sequence templates designed for common use cases
- Saves time by providing proven sequence structures you can customize
- Ideal for standard outreach patterns like cold outreach, follow-ups, or onboarding
- Clone a sequence: Copy an existing sequence from your workspace
- Preserves all steps, variants, and configurations from the original
- Perfect for creating variations of successful sequences or adapting a teammate’s sequence
- Start from scratch: Build a completely custom sequence from the ground up
- Name your sequence with a clear, descriptive title (i.e Tech Founders Email Multi-Channel Cold Outreach)
- Add sequence steps in order:
- Automated email steps: Compose email content or select from templates
- Manual task steps: Add call tasks, LinkedIn connection requests, or other manual actions
- Wait periods: Set delays between steps (hours or days)
- Configure step variants for A/B testing different messaging approaches
- Set your sending schedule to control when emails go out
- Enable the variant you want to activate for this sequence
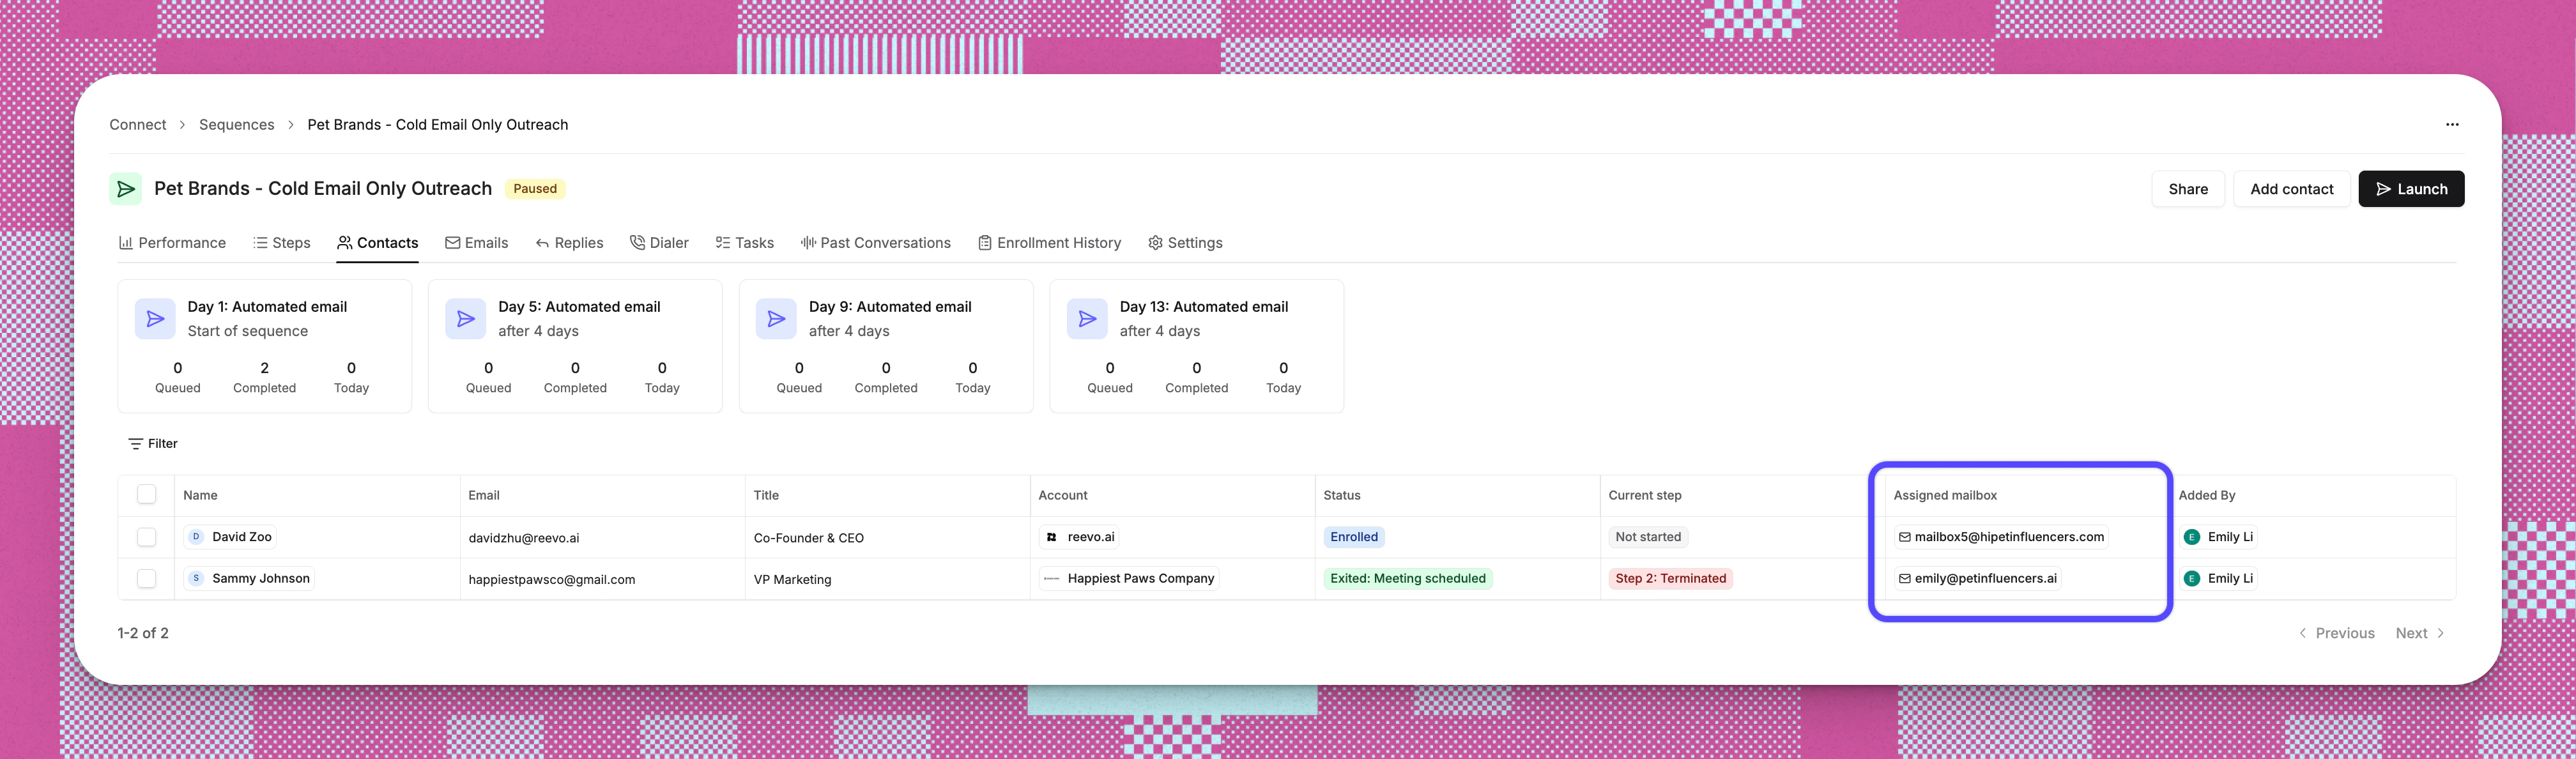
👤 Step 2: Enrolling Contacts
In order to launch a Sequence, at least 1 contact must be enrolled. There are four primary methods for adding contacts to sequences:| Enrollment Method | How to Access | What It Does | When to Use |
|---|---|---|---|
| Add from List | Go to Connect > Sequences, click Add contact, select Add from list. | Allows you to select an existing contact list and enroll all contacts from that list at once. | Best for bulk enrolling pre-defined groups you have already organized. |
| Add from CRM | Go to Connect > Sequences, click Add contact, select Add from CRM. | Opens a search interface to find contacts by name/email. Note: Admins can toggle between personal or organization-wide contacts. | Ideal for hand-picking specific contacts or reviewing individuals before enrollment. |
| Add from Prospecting | Go to Connect > Sequences, click Add contact, select Add from prospecting. | Redirects you to the prospecting tool to search for new leads and enroll them immediately. | Perfect for finding and enrolling net-new prospects who are not yet in your database. |
| Chrome Extension | Open the Reevo Chrome Extension while viewing a LinkedIn profile. | Allows you to extract a contact and enroll them directly without leaving the LinkedIn tab. | Streamlines workflow when prospecting on LinkedIn to avoid tab-switching. |
📬 Step 3: Configure Mailbox & Sending Method

🚀 Step 4: Launch Sequence
Review your sequence and click Launch to activate it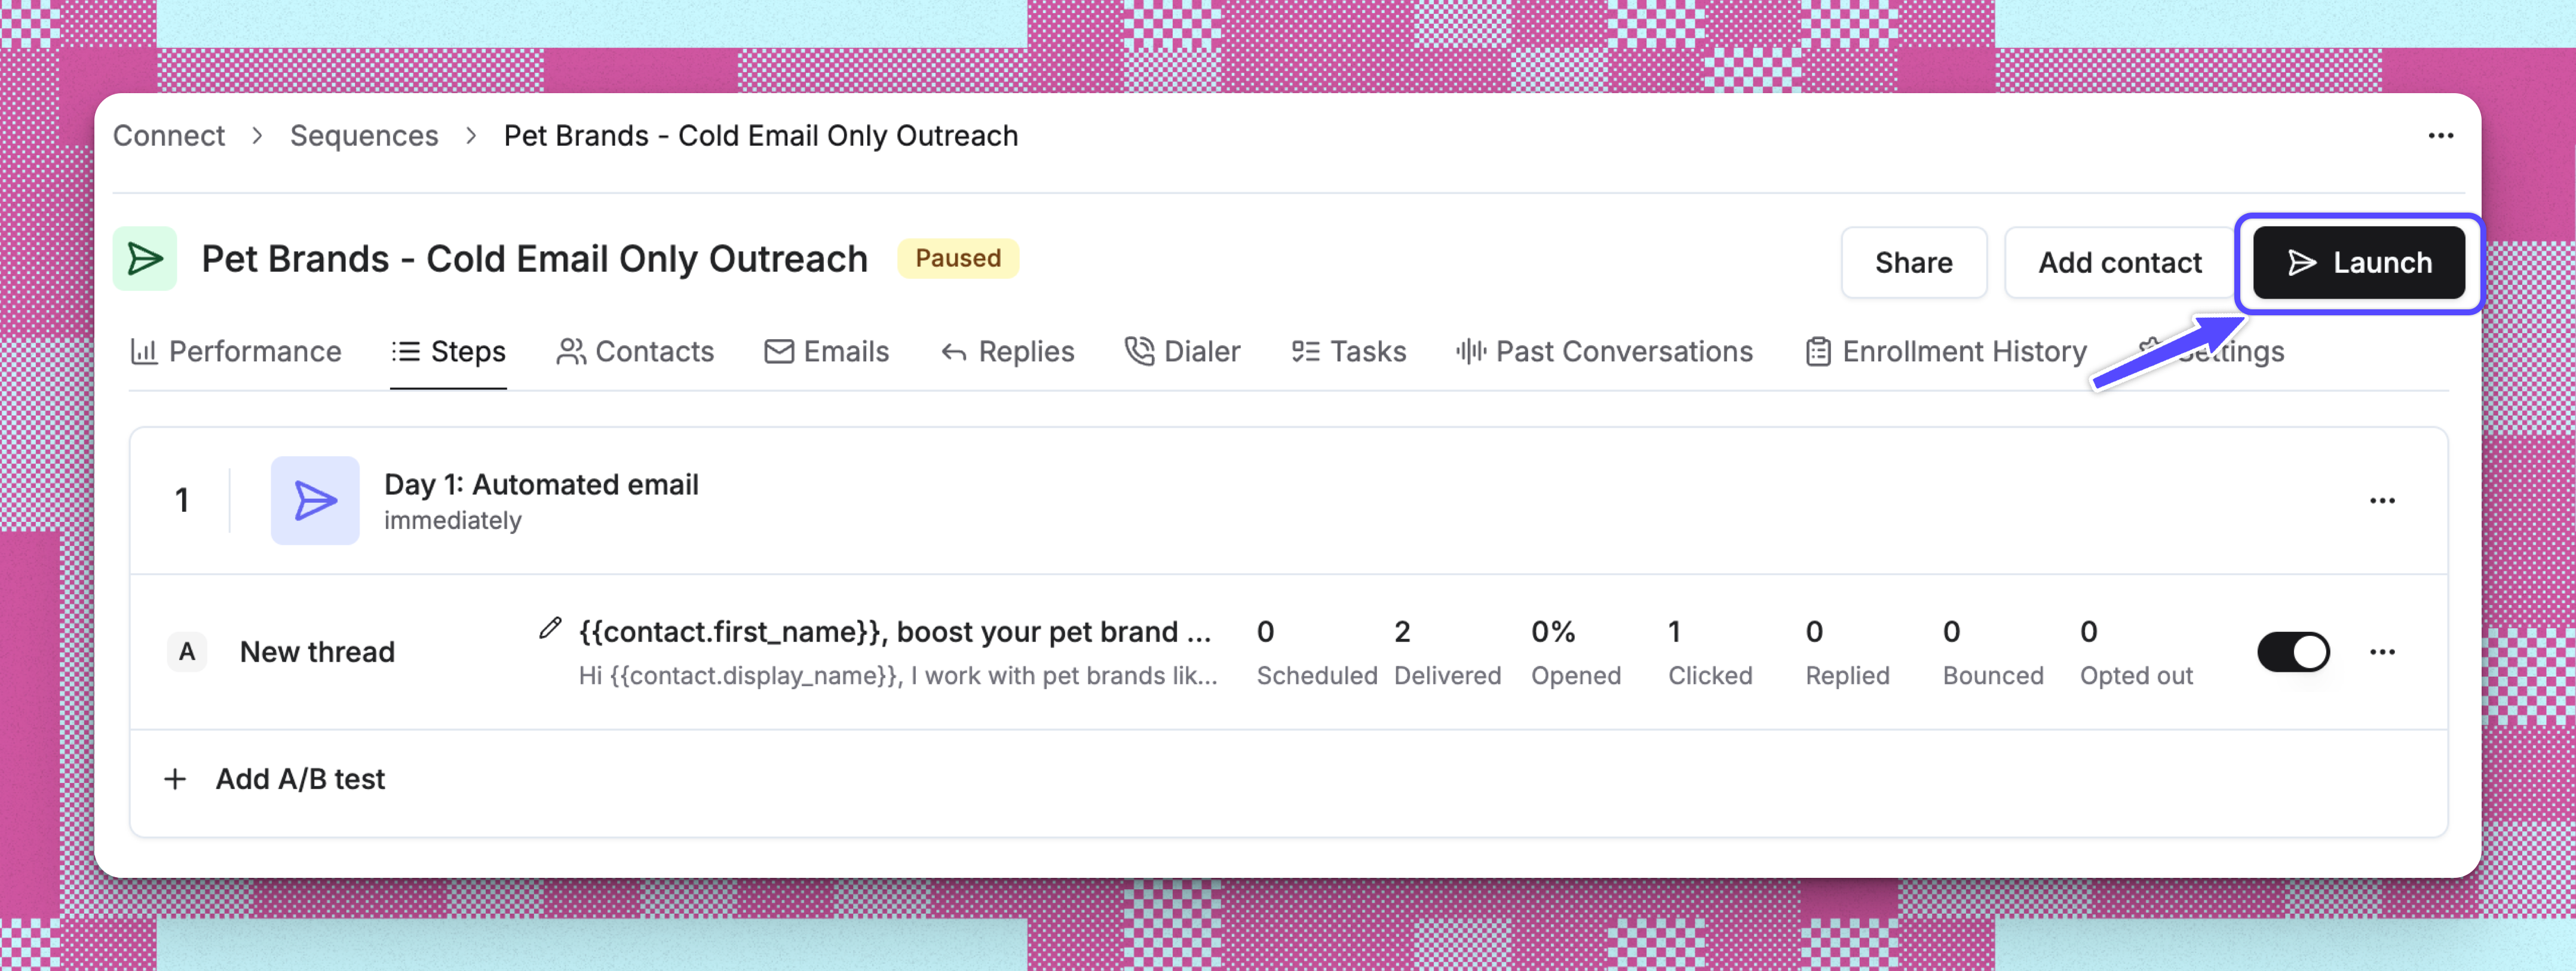
Enrollment Status Tracking
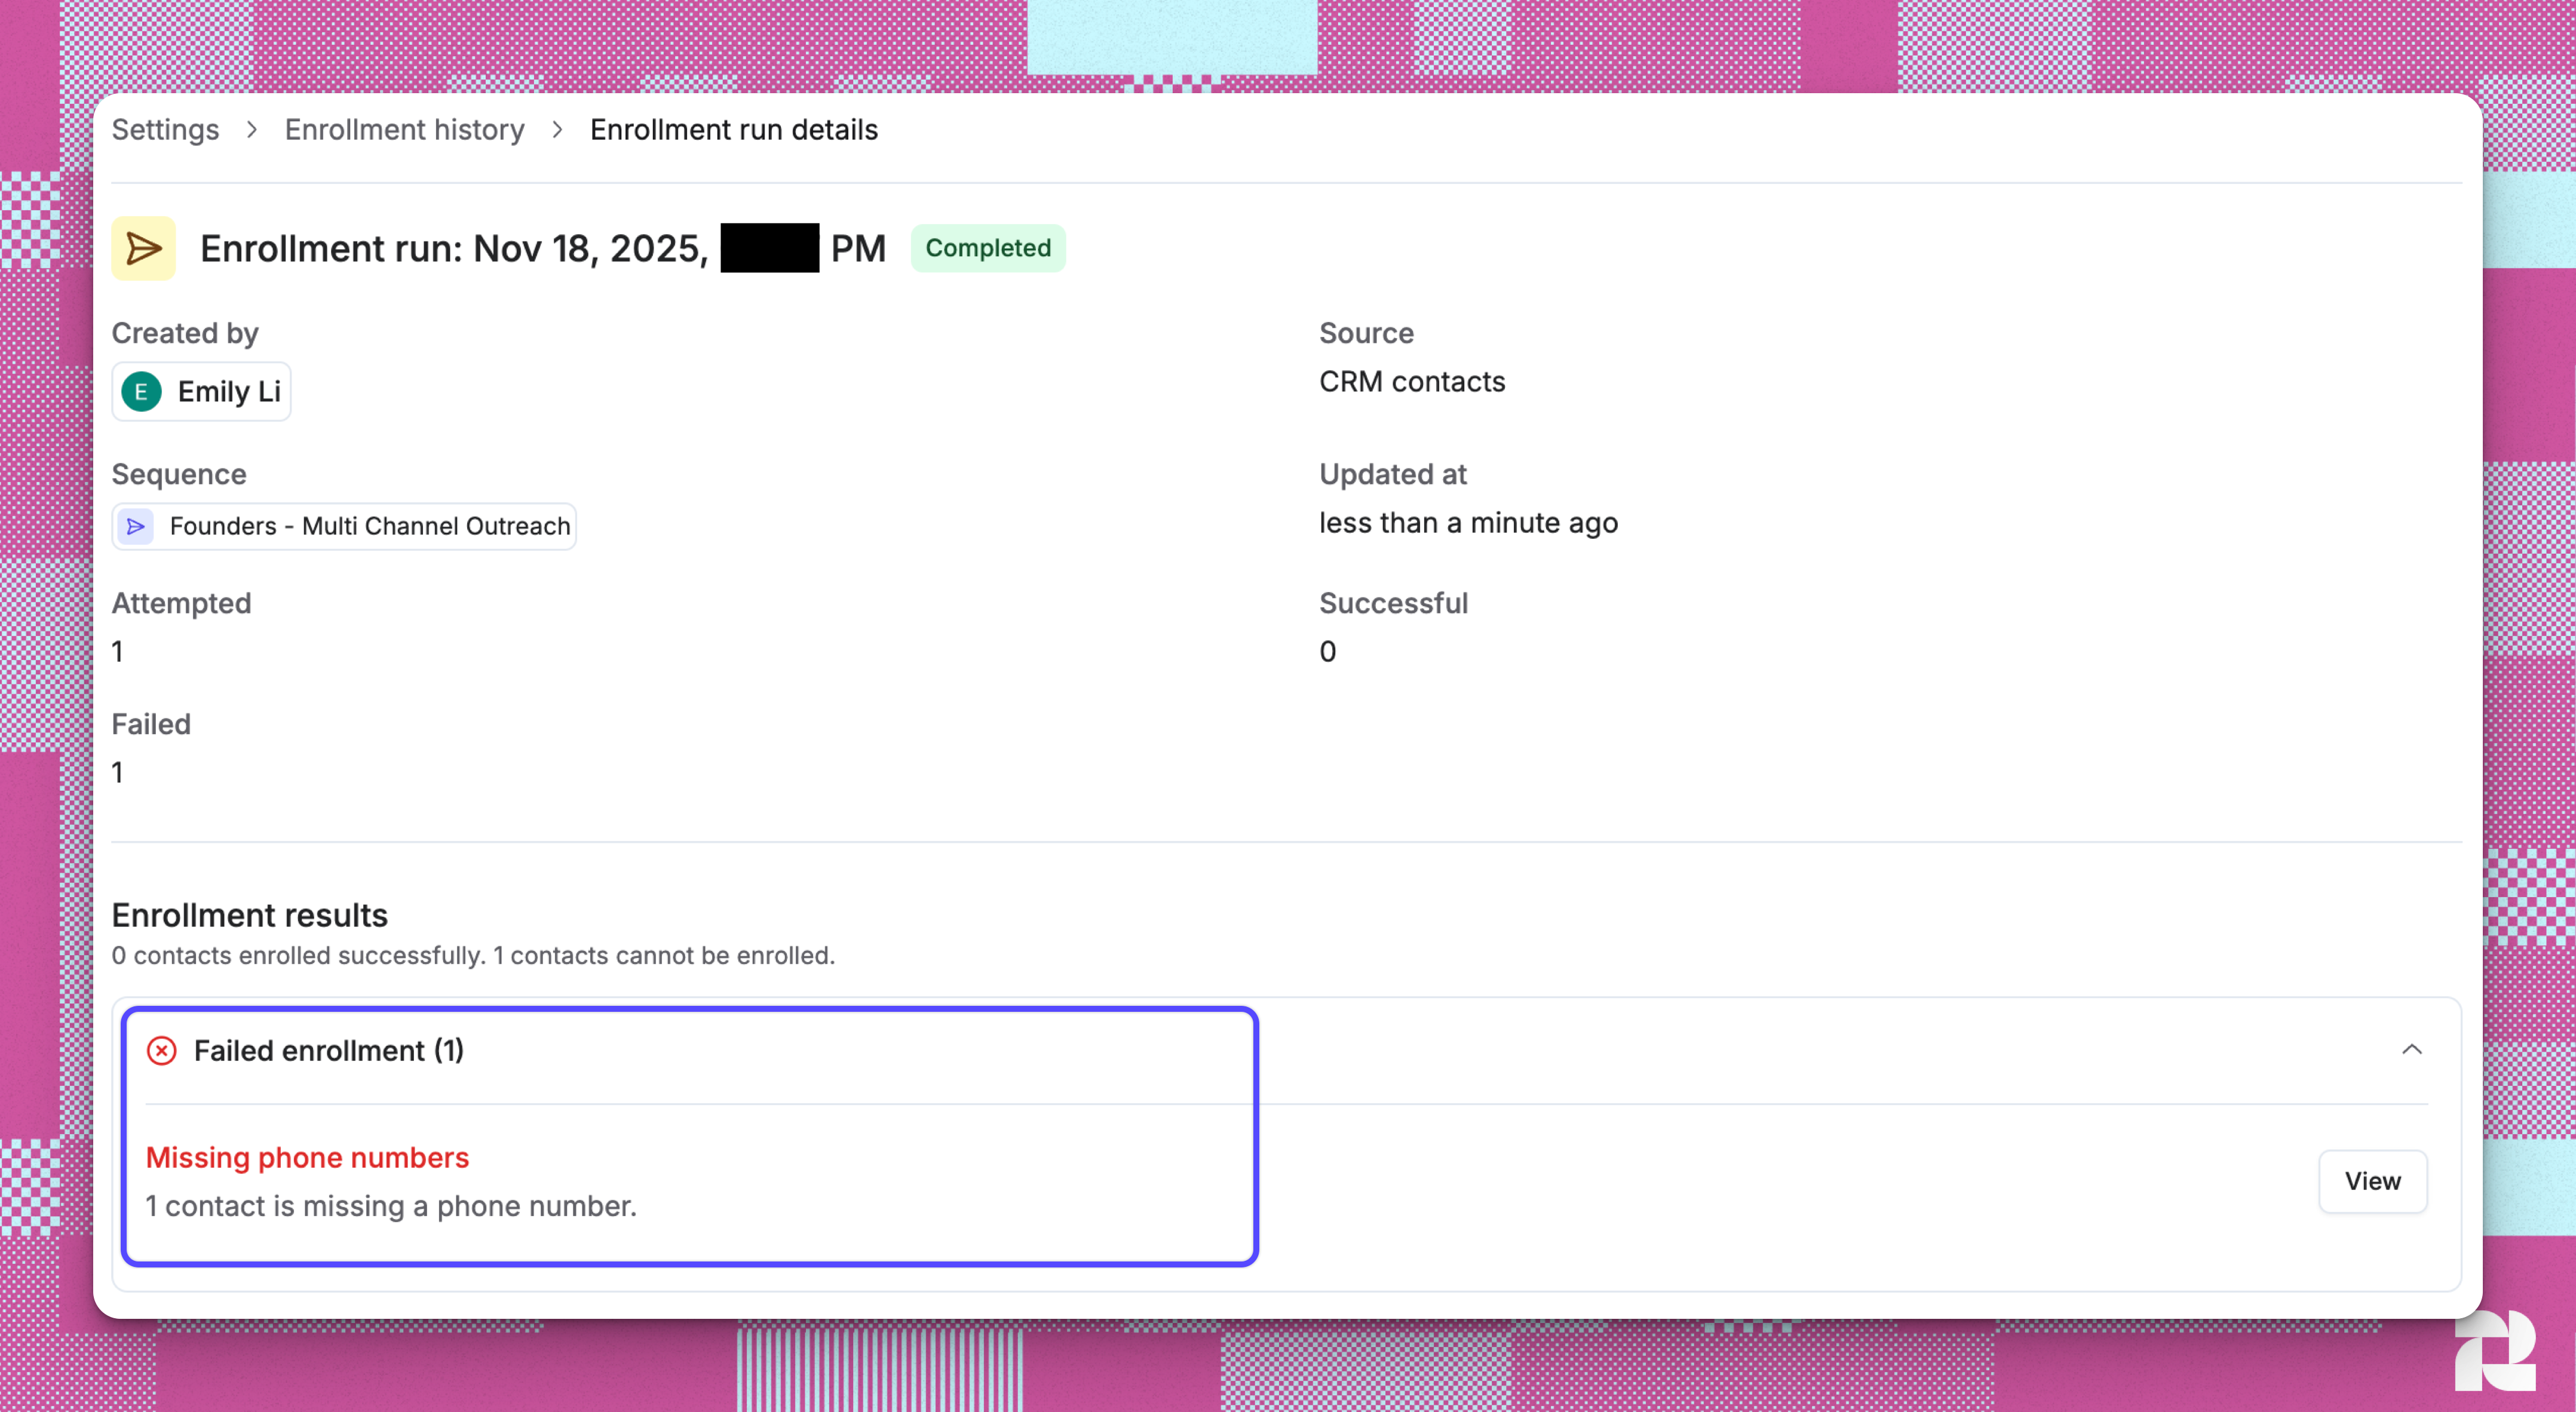
Behind the scenes, once a sequence is launched the system tracks detailed enrollment status information including when contacts were enrolled, when they exited, and why they exited. This powers the enrollment history views and helps you understand the full lifecycle of each contact’s journey through your sequences.Enrollment Run Details
When you click into a specific enrollment run, you’ll see:
- Contact is already enrolled in another sequence
- Email address is risky (Not recommended or Use with caution)
- Contact does not have an account
- Contact does not have an owner
Why Enrollment History Matters
Enrollment History helps you:- Troubleshoot enrollment issues: Understand why specific contacts failed to enroll so you can fix the underlying problems
- Maintain data quality: Identify contacts missing required information (emails, accounts, owners)
- Protect sender reputation: See which contacts were blocked due to risky email addresses
- Track enrichment progress: Monitor email and phone enrichment runs that were triggered during enrollment
- Re-enroll contacts: After fixing issues, you can retry enrollment for failed contacts
Sequence Rules and Automation
Sequences respect several rules to protect deliverability and user experience:- Reply detection: When the TO recipient replies to a sequence email, they automatically exit the sequence. Replies from CC’d recipients do not exit the sequence.
- Sending schedules: Emails only send during your configured business hours
- Mailbox rotation: If using multiple mailboxes, sequences distribute sends across them
- Duplicate prevention: Contacts cannot be enrolled in multiple sequences simultaneously
- Missing field handling: When a contact reaches a step requiring information they don’t have (email, phone, or LinkedIn), Reevo follows the fallback rule configured for that channel - pausing, skipping, or exiting the contact. See Sequences: Manage Missing Contact Fields to configure this.
Troubleshooting / FAQs
Why aren't my sequence emails sending?
Why aren't my sequence emails sending?
- Verify your mailbox is connected and healthy in Settings
- Confirm your sending schedule allows emails at the current time
- Check if you’ve reached your monthly email quota in Usage
- Ensure contacts are not already in another active sequence
The launch button is gray and I can't launch a sequence
The launch button is gray and I can't launch a sequence
Can I edit a sequence after contacts are enrolled?
Can I edit a sequence after contacts are enrolled?
What happens when a contact replies to a sequence email?
What happens when a contact replies to a sequence email?
How do I know which sequence variant is performing better?
How do I know which sequence variant is performing better?
Can I use sequences for existing customers or only prospects?
Can I use sequences for existing customers or only prospects?
What happens if a contact's CRM owner doesn't have a mailbox?
What happens if a contact's CRM owner doesn't have a mailbox?
Can I change the sending method after a sequence is already running?
Can I change the sending method after a sequence is already running?
Does the sending method apply to all step types, or just automated emails?
Does the sending method apply to all step types, or just automated emails?
How are emails distributed across multiple mailboxes when using specific mailboxes?
How are emails distributed across multiple mailboxes when using specific mailboxes?
What happens if one of my selected mailboxes becomes unhealthy mid-sequence?
What happens if one of my selected mailboxes becomes unhealthy mid-sequence?
Is a fallback mailbox required?
Is a fallback mailbox required?
Does my sending method choice carry over to future enrollments?
Does my sending method choice carry over to future enrollments?
Can regular users access all mailboxes when enrolling, or only their own?
Can regular users access all mailboxes when enrolling, or only their own?