Overview
This guide walks you through the essential steps to get your Reevo workspace set up and ready to capture activity automatically. You’ll learn how to control when new accounts and contacts are created, connect key apps like Google and Zoom to sync emails and meetings, and adjust other Organizational Settings that define how your CRM operates at the company level. If you’re not an admin, some settings may not apply to you; however, this article will help you understand how your organization’s account setup works.Watch: Account Setup Overview
This short video walks through the key steps — configuring record creation, connecting your apps, and completing your organization’s initial setup.Step-by-Step Guide
To log in, go to reevo.ai. You can sign in using Google or with the email you used to sign up for Reevo. After logging in, you’ll be prompted to confirm your basic company information like your name, company, website, industry, and team size. This helps personalize your workspace setup. You can always edit it later from your settings.1. Record Auto-Creation Settings
Choose how Reevo should create new accounts and contacts based on who you engage with. These settings apply at the organization level, and only admins can set or edit them. You can always update these options later in your account settings. If you see a notice about missing Google permissions, it simply means your Google account isn’t connected yet — syncing will start once you grant access in the next step.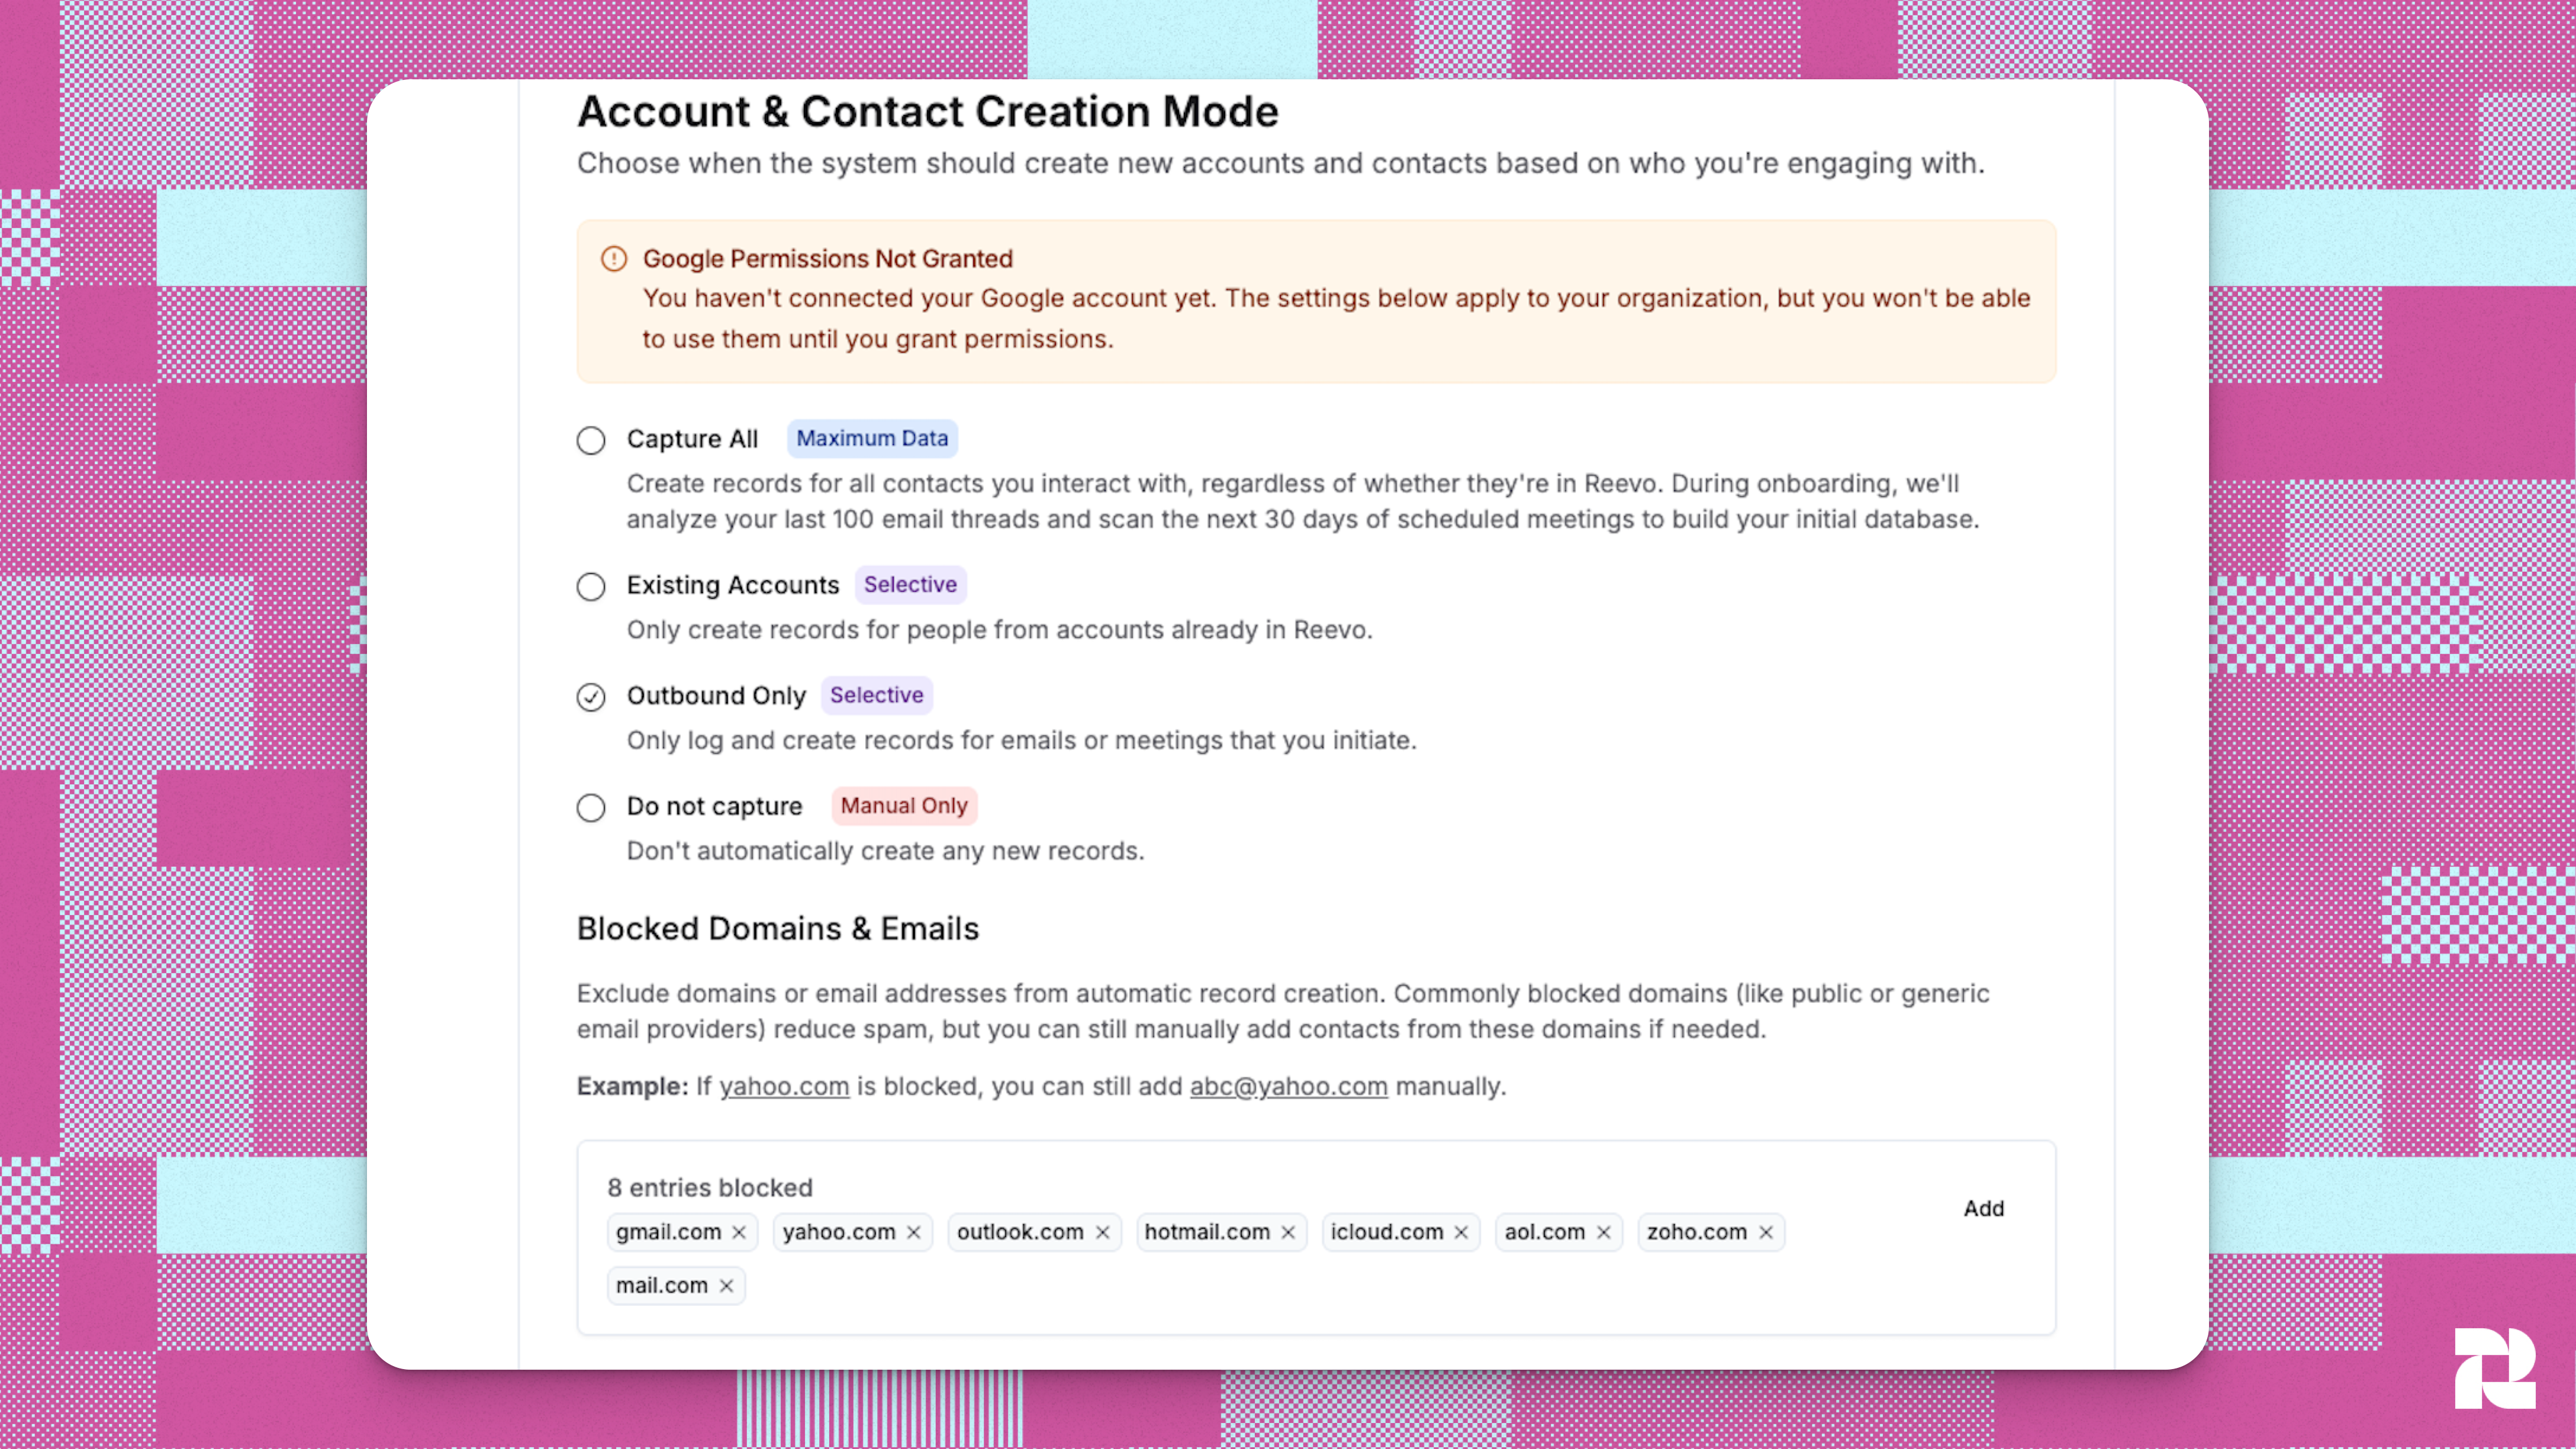
- Capture All: Automatically creates records for every contact and company you engage with — even if they don’t already exist in your CRM. Best if you want complete visibility across all email and meeting activity. If there are sensitive contacts or domains you don’t want synced, you can block them in your settings.
- Existing Accounts: Creates new records only for people tied to accounts that already exist in Reevo. Choose this option if you want tighter control over your CRM data and prefer to avoid new or unqualified companies being added automatically.
- Outbound Only: Creates records only for emails or meetings that you initiate. Ideal if you want to capture meaningful engagement while keeping inbound or unsolicited activity out of your CRM.
- Do Not Capture: Turns off automatic record creation completely. Choose this if you want to manage all records manually and only log activity you add yourself.
2. Connected Apps
Connect your primary apps to sync activity and enhance how you interact with Reevo. For the full walkthrough, including Outlook, auto-sync toggles, and reconnecting a broken integration, see Email & Calendar.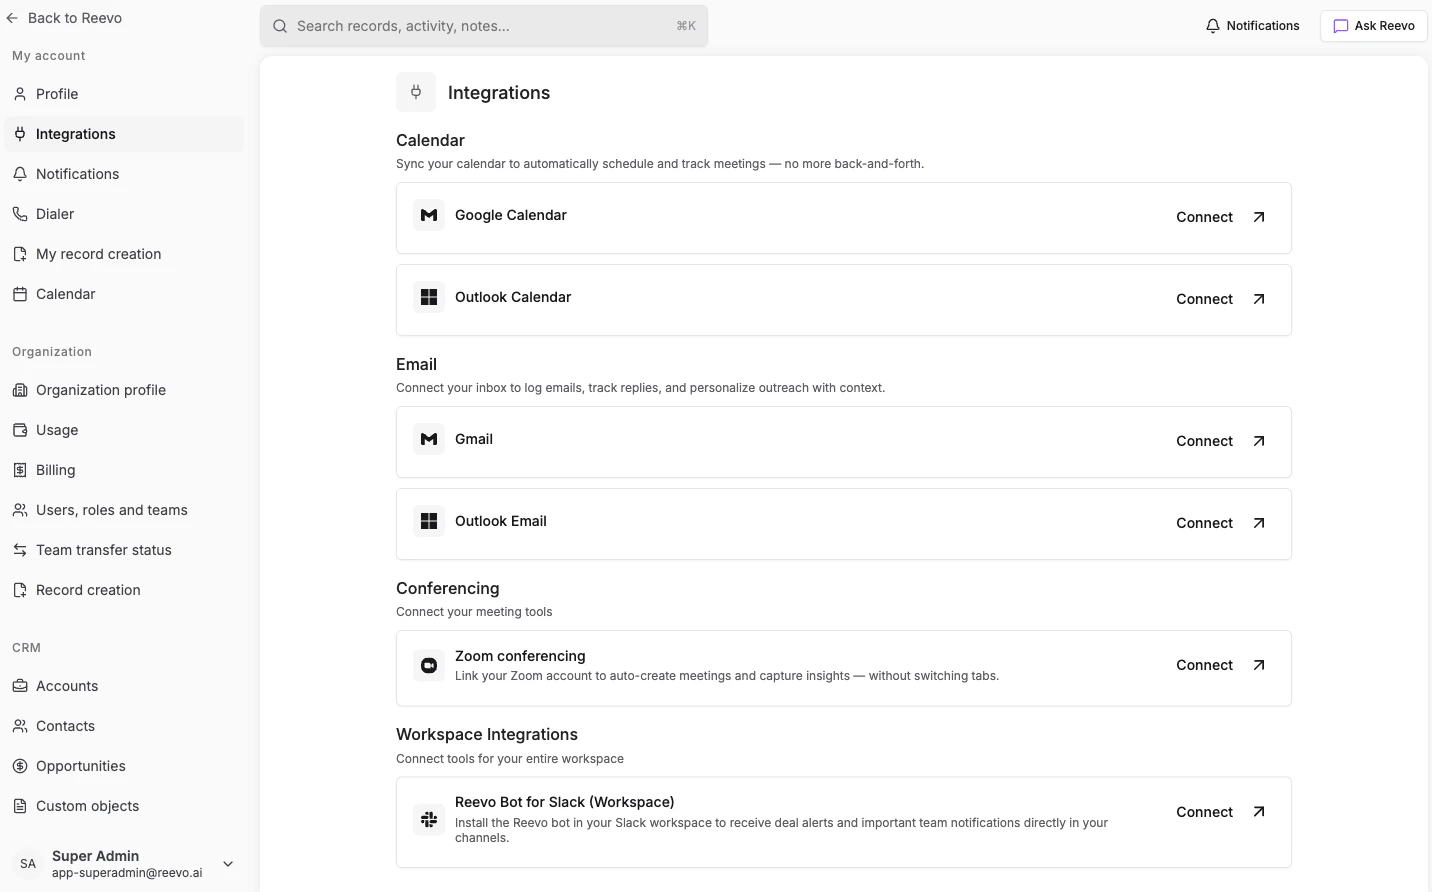
-
Google or Microsoft: Syncs your email and calendar events for automatic activity capture.
Automatically created Google events (like flight reservations) default to “Only me” visibility and don’t block time on your calendar. To prevent customers from booking over these events, change their visibility to “Calendar default”in Google Calendar settings under Smart Features.
- Zoom: Connects your meeting platform so recordings and summaries appear in Reevo.
- Slack: Lets you use the Ask Reevo AI agent and receive notifications directly in your Slack workspace
3. Other Organizational Settings
Finish your setup by configuring a few other account preferences. These settings help align your team and data before you start using Reevo.- Set up your team: Invite teammates by entering their email addresses and assigning roles. Shared access ensures everyone can collaborate on contacts, meetings, and deals seamlessly.
- Create a calendar link: Define your working hours, select available days, and add buffer times before or after meetings. Contacts can use this link to book meetings directly based on your availability. Each meeting automatically creates or updates contact records in Reevo, ensuring every touchpoint is tracked.
- Customize your CRM: Configure core CRM settings like opportunity stages, pipeline structure, and key fields to match your team’s sales process. You can rename, reorder, or expand stages as needed, ensuring your workspace reflects how your team actually sells.